CS-Cart Tutorial – How to Install Cs Cart on your Web Hosting Account?
May 18, 2012, by admin
What is Cs Cart?
 CS-Cart is an exceptional and inexpensive shopping cart solution which will help you create and manage your online store. The CS-Cart shopping cart is easy to install, has an perceptive template management system with built-in templates to choose from, and user-friendly admin area. Bugtreat is a recommended Desing provider by the CS-Cart e-store and will provide you with a reliable, good and error free Design solution where you can use all CS-Cart features.
How to install Cs-Cart – Cs-Cart Installation
Please note that CS-Cart may not work properly if your account is running PHP 5.0.5. If you are having issues with your CS-Cart, you should change the PHP version of your account to 5.2.
CS-Cart Automatic Installation through cPanel
Bugtreat introduces a fast and easy CS-Cart installation solution through the special Site Software tool in cPanel. If your web host doesn’t offer such an installation go below to the CS-Cart manual installation.
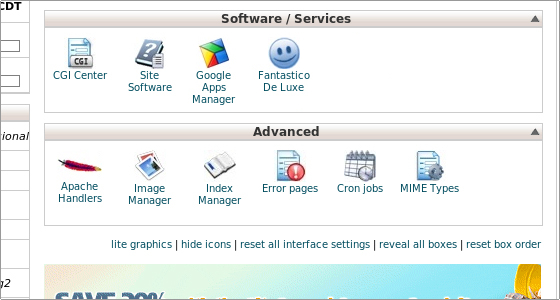
In order to complete the automatic CS-Cart installation in several steps open your cPanel and navigate to Site Software.
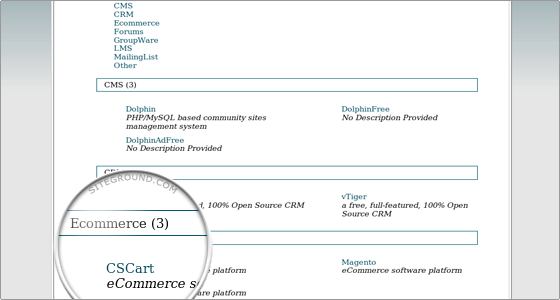
Click on the CSCart link in the Ecommerce section.
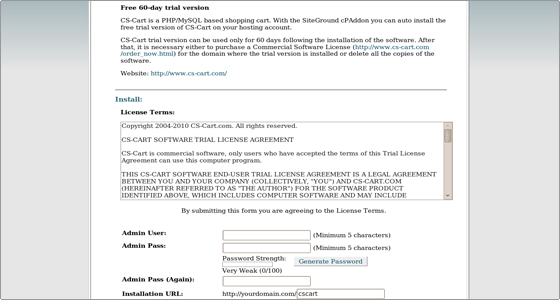
 Enter the required details: admin username, admin password and the installation folder. You should also add the administrator’s full name and the e-mail address.
In order to complete the installation read the license information, the disclaimer, agree to the terms and click on the Install button.
On the last screen you will find the URLs of your installation’s front and back ends, the CS-Cart admin login details and the link to the bugtreat CS-Cart tutorial. Also, the CS-Cart encryption key will be visualised.
CS-Cart Manual Installation
Follow the steps listed below in order to complete the CS-Cart installation manually.
Step 1. Database setup
Step 2. Upload Files
Step 2.1. You may uncompress the distribution file of the application on your local computer and upload all the files in the folder where you would like the CS-Cart application installed. You can also extract the CS-Cart file directly on your hosting account. You should first upload it under the folder where you would like the application installed. Once the file is uploaded, you should extract it under the folder it is located. You can extract the file using File Manager in your cPanel.
Step 2.2. Go to the CS-Cart installation directory and change the file access permissions.
You should change the permissions of the following files:
admin.php
config.php
index.php
image.php
and of the following folders:
var
images
skins
Note that via cPanel the permissions are not set recursively.
You can change the permissions through cPanel > File Manager.
Alternatively, you can use an FTP client.
Step 3. Once having the installation files uploaded to your account, you should open the CS-Cart Installation Wizard in your browser at:
http://www.yourdomain.com/cscart_folder/
You will see this message:
CS-Cart is not installed. Please click here to start the installation process: [install]
To proceed with the installation, you should click the install link.
The first two steps of the installation are License agreement and Checking requirements. Once you agree with the terms and see that all requirements are met, you should click on Next to proceed to the Host and database settings.
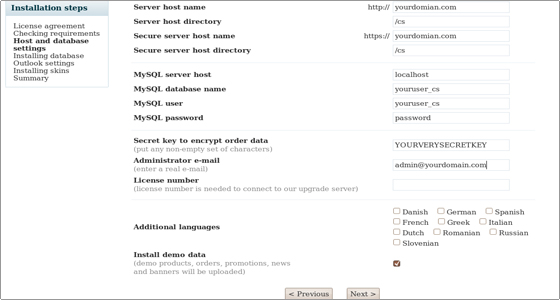
Here is how the settings should be set:
CS-Cart DB details
In order to use a secure server with your domain, you should have a private SSL. If you don’t have a certificate yet, you can purchase one from your Customer Area->Order section.
You should enter localhost for Database server host.
In the fields for the database name, user and password you should enter the MySQL database, username and password you have created during the database setup.
Then you should enter a secret key to your preference and the administrator e-mail. If you are not installing the trial version of the script you should enter the License number. You may also choose additional languages if you intend to use them.
It is also advisable to install the demo data.
When you are ready with the details, click on Next.
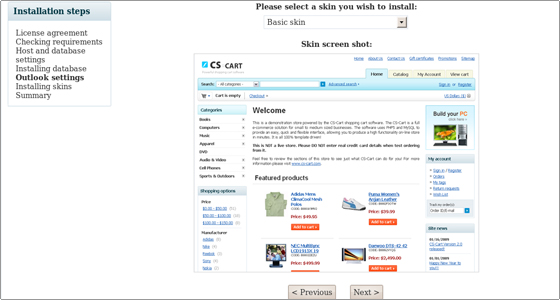
After the database is installed and configured, you will be able to choose a skin for your CS-Cart.
CS-Cart Outlook settings
When you are ready , click on Next. The skin will be installed.
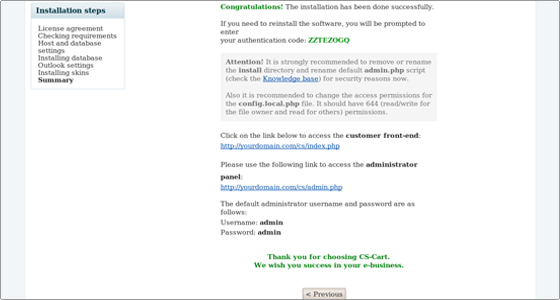
If everything has been installed correctly, you will be taken to the Summary page, which is the last for the CS-Cart installation.
CS-Cart Summary
It is strongly recommended to remove or rename the install.php file due to security reasons.
Please also make sure you bookmark the two links for your shop’s front and back-end, as you will be visiting them quite often.


