css tutorial – How to make a linked .css
Jul 23, 2012, by admin
Over the years, web design and development standards have changed. One of these changes is in the use of Cascading Style Sheets (CSS) to control the overall appearance of a website. Utilizing CSS in your website design enables the you as the developer to make sweeping changes to the entire site while only modifying one line of code.
1.Begin by opening a simple text editor such as Notepad (in the Accessories folder of the Windows programs menu).
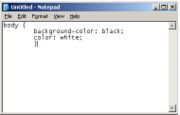
2.The first style modifications you will make are going to affect the whole web page so you will begin by adjusting the background color and text color of the entire page. First type body {
 3.Now try changing the background color by typing background-color: immediately followed by the color code and ending the line with a semicolon (each line within a style tag must be ended by a semicolon). The color code can be entered in several ways.
 Hexadecimal notation – a six-digit alpha-numeric code that lists the red, green and blue values, in that order, for that color. (i.e. #000000 is black, #FFFFFF is white, #FFFF00 is yellow).
- Red, Green, Blue percentage – uses a percentage value to denote how much of each color is represented (i.e. rgb(100%, 100%, 0%) is yellow and rgb(100%, 50%, 0%) is orange).
- Red, Green Blue values – this technique is similar to the percentage but the value used is from 0 to 128 (i.e. rgb(128,128,128) is white and rgb(64,64,64) is grey).
- Color name – certain colors can be entered as a text value like black, white, red, blue, green.
4.To affect the text color type color: followed by the desired color. Use any of the techniques listed above for changing the background-color.
 5.Close the body tag by typing an ending }
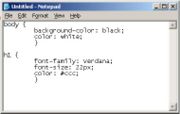
 6.In this example, we will make similar changes to the <h1> tag (Header 1) by next typing h1 {
 7.Modify the font that will be used by the browser to make any text contained in this tag. Here we will be using the verdana font which is one of the default fonts installed with most Windows operating systems. A good rule of thumb is to list two desired font-types and then a font class. You would implement this by typing font-family: verdana, arial, sans serif; However, as we’ve shown here, you can simply chose just one font.
8.To adapt the size of the text, type font-size: followed by the desired size . The size can be defined in pixels and ems. For now, define the text size at 22px.
9.Change the color of the text using the same methods defined above for affecting the body style. In this example we’re making the text grey by typing the hexadecimal color codecolor: #CCCCCC;
10.Don’t forget to close the h1 style definition by typing }
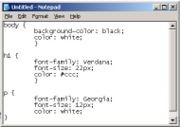
11.To change the paragraph tag begin by typing p { and make changes similar to those made in the h1 style definition.
 12.Once you are satisfied with your style definitions you must save the file in a format that the browser will distinguish. In this case we will save the file as styles.css though you can actually name the file as you chose so long as it ends in .css (i.e. mystyle.css, myfile.css, sitestyle.css). For people using Windows Notepad, make sure that the “Save as type” drop down box says “All files” or an additional .txt file extension will be added. For this example, we will also save our CSS in the same folder as the web page we are working on.
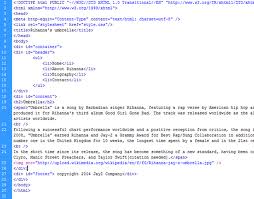
13.Still using your text editor, open the html file where you wish to link the CSS.
14.Insert the following line of code somewhere between the <head> tags: ”'<link rel=”stylesheet” type=”text/css” href=”styles.css” media=”all”>”’
- link rel=”stylesheet” (The link relationship with the document, is a stylesheet)
- type=”text/css” – tells the browser what type of document you are linking to.
- href=”styles.css” – the path to the location of the style sheet.
- media=”all” – specifies the type of media the link tag is referencing.
15.Refresh or open your browser to see the changes you’ve made to your web page.


