TomatoCart Tutorial – how to install tomatocart on your web hosting account
Jun 09, 2012, by admin
TomatoCart Installation
 Like all other applications you might have installed, TomatoCart installation takes place via the browser. To start the application, you should access your website or the subfolder, where you have uploaded TomatoCart into. Let us again assume it is in the root folder, so open a new browser window and point it to your domain name, say, www.yourdomain.com. If you have followed the articles up to now, you should see a screen similar to this:
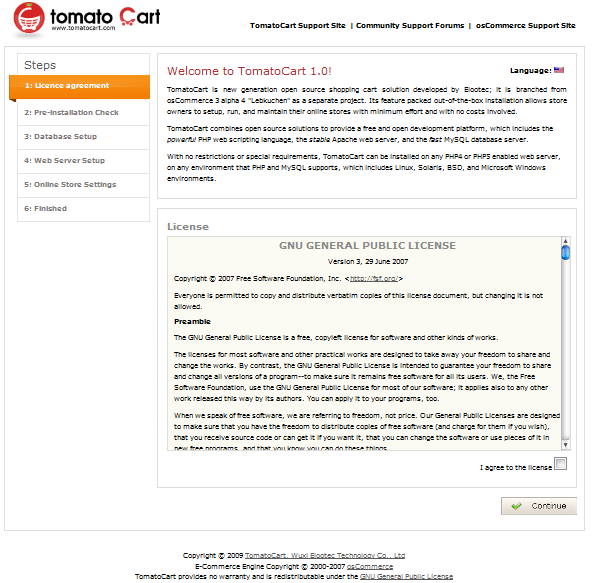 At it, you will be informed of the product’s license, terms and other stuff that you might be interested to read. It is basically about the open source license and its terms. You should state that you agree with the terms of the license, check the box on the bottom right and advance with the “Continue” button to the next step.
This step is about checking system requirements that TomatoCart imposes for proper operation.
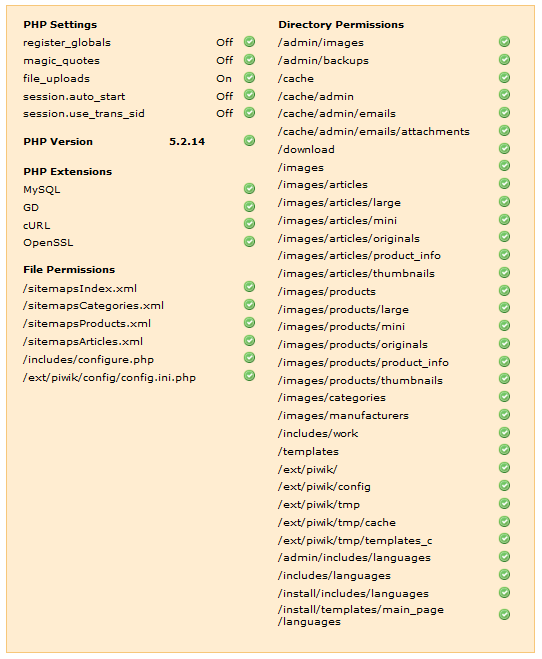 Click on the “Continue” button in order to advance at the next step. Now that you are at the third step, you should already have the details that the form requires:
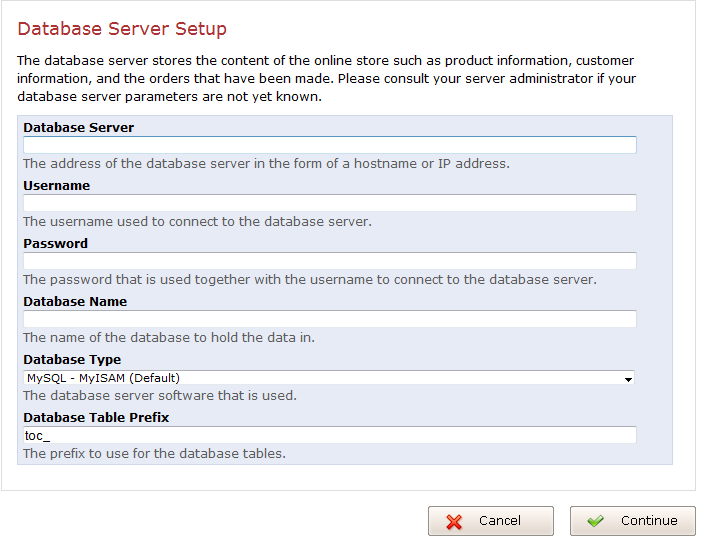 These are the ones we have created and written down before, while we have been waiting for the files upload through the FTP. The “Database server” field should have value of:
localhost
unless, you have been advised to use another one, specifically, upon your account creation. This, however, rarely happens and you would have been notified if you are one of the few accounts that are included in it.
In the Username, Password and Database name fields you should fill the data we have written down while creating the MySQL database. We recommend leaving the Database type and Database Table Prefix field with their default values. At the end, verify the information and click the “Continue” button and wait for the database to be populated. Upon completion you will see a success confirmation on the left, and then you will be forwarded to the “Web Server” setup page.
The TomatoCart developers eased the process of installation as much as possible, including obtaining all possible values, which you might not know, on their own:
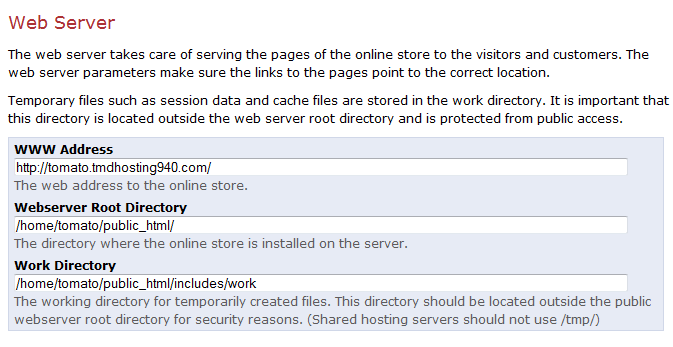 This is the case here, where everything is pre-filled by default. All you need to do is to click on the “Continue” button and proceed further.
Now that you are at the Online Store settings page, there are some settings that you need to adjust as per your preferences, as they cannot be predicted or assumed:
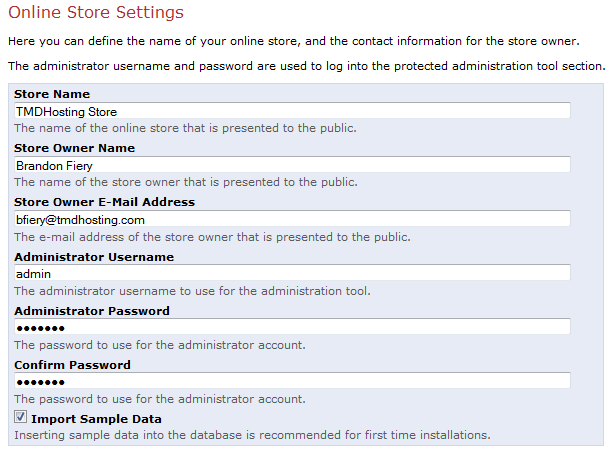 You should fill the name of your store in the “Store Name” field, as well as the store owner name in the “Store owner name” field. You are not obliged to use your real name, but it is recommended if you want to show your customers more transparency and gain reliability.
Fill an existing email address in the “Store owner e-mail address”. You will receive various type of information at it and you should not use a counterfeit one.
Pick up a username and password to access the administration area in the last three fields. We suggest if this is your first store to leave the “Import Sample Data” checkbox, as it would be good to see some examples of products configuration. When done, double check the inserted information carefully and click the “Continue” button to complete the installation process.
Upon success, you will be forwarded to the confirmation page, which contains the links to your store’s frontend and backend:
 Open both of them in separate windows and let us get started with the real store management. This was just the installation!

