TomatoCart Tutorial – How to install TomatoCart Shopping Cart Solution on your web server
Jun 01, 2012, by admin
What is TomatoCart
TomatoCart is an open source shopping cart solution that offers a wide range of features which allows users to set up an online store in a fairly quick way. TomatoCart goal is to combine the best of open source and commercial software. Tomatocart offer to their users unlimited flexibility and innovation that comes with free access to the source code, along with the expertise and professional support of high-quality commercial software.
TomatoCart believe that only with free access to the source code can users create solutions which truly fit their needs. Tomatocart also believe that open source is an extremely proficient software development process, as the free access to source code can unleash the collective innovation of a global community.
TomatoCart Tutorial for Beginners
How to install TomatoCart Shopping Cart Solution on your web server
Download and Install Filezilla
 TomatoCart currently cannot be installed through autoinstallers, such as Softaculous or Fantastico. However, based on its rapid development it’s just a matter of time before it becomes available there, just as the other big players on the open source e-commerce software market.
At the moment the installation of TomatoCart must be performed manually, which as you will see is not much of an issue as it is a straight-forward process. You should first obtain FTP software, if you do not have such on your computer yet. This software is used to transfer files from your computer to your hosting account with us, using the File Transfer internet protocol, which is what FTP means. If you prefer using your own client, of course – you can do it, FTP is not client sensitive, so you should not be running in any issues with this. This tutorial shows how to do it with FileZilla, which is a free, powerful and easy to use solution.
Download and installing FileZilla
You can download FileZilla from www.filezilla-project.org. You will be provided with option to pick either the client or the server, or both, but all you need is the client. The server is already running on your hosting account with us:
 Once you complete the download, you will have to install the software on your computer, according to the ReadMe you will be provided upon launching the installer. On most operating systems, this should be a “Next -> Next -> Next” installation.
Download TomatoCart and Upload it through FTP
When you are done with the FileZilla installation, you are ready to proceed with the download of TomatoCart. Latest version can be obtained from www.tomatocart.com via the Download button on the front page:
It will redirect you to an internal page, on which you should choose the “Download now” link. Your download will start, and respectively complete, shortly. The moment you complete the download, you are now ready to upload. If you are new to the hosting world, you might connect the word upload with the controversial meaning – download. Down is for getting the files on your computer, up is for putting them online.
When you are ready with downloading the archive on your computer, extract it in a separate folder as shown on the image below:
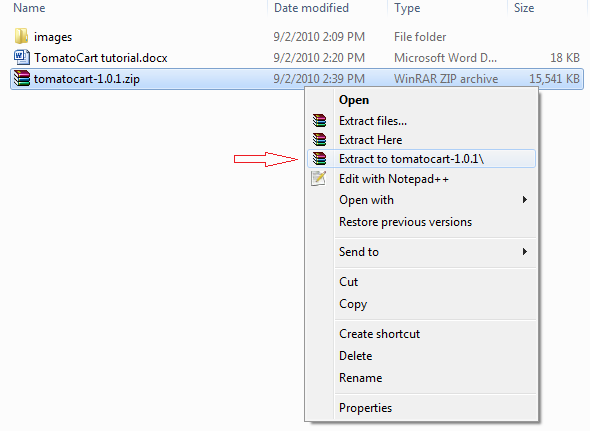 Wait for the process to complete, then find the FileZilla icon on your desktop and start it:
![]() When you start the FTP client, do not be puzzled from the boxes you will see. Their purpose, as already mentioned is pretty straight-forward. What you should remember, basically, is that the left box (looks like the Windows Explorer or the Mac Finder) is your computer and the right (looks the same) is the FTP server you are connected to. Things basically happen when drag and drop, either from right to left, vise versa. In order to connect to FTP, however, you need to have hostname, username and password. These are usually provided in your welcome email, which you receive when you sign up with us. If you are unsure where you have received your login details, they are sent to your email and the message is with a subject “Welcome to TMDHosting”. The part of the message you need looks like this:
When you start the FTP client, do not be puzzled from the boxes you will see. Their purpose, as already mentioned is pretty straight-forward. What you should remember, basically, is that the left box (looks like the Windows Explorer or the Mac Finder) is your computer and the right (looks the same) is the FTP server you are connected to. Things basically happen when drag and drop, either from right to left, vise versa. In order to connect to FTP, however, you need to have hostname, username and password. These are usually provided in your welcome email, which you receive when you sign up with us. If you are unsure where you have received your login details, they are sent to your email and the message is with a subject “Welcome to TMDHosting”. The part of the message you need looks like this:
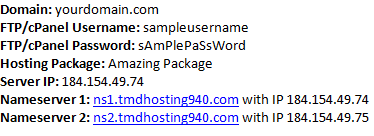 You should save these login details, so that you can use them later on in this tutorial, when you require to use your cPanel to create a database for your new online store. At the top of the window you should initiate the connection first. Fill in the following boxes:
 using the information, which you have been provided in your welcome email.
From the required fields, only the Port is not provided in the welcome email, however, it is not eventually required by the software to operate. It applies the default FTP port, which is 21 – keep that in mind if you need to use it for some reason. When you connect successfully, both left and right side should be populated with folders:
 First browse on the left side and navigate to the folder, which contains the extracted TomatoCart files. It should look similar to this:
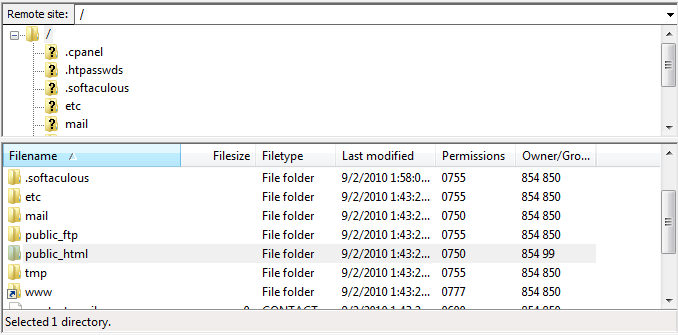
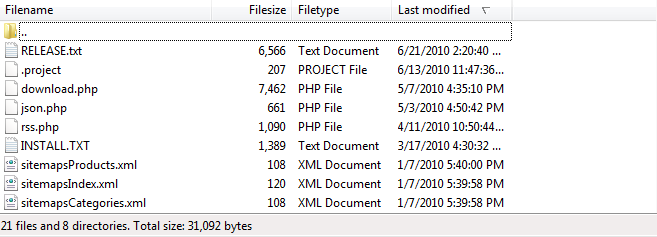 Then, focus on the right side and find the public_html folder:
and double click to enter it. This is the folder, which contains all the files your website will have. Files or folders outside of this directory are not viewable under web.
Then, back on the left, click once in the box with the mouse and press CTRL + A. This keyboard combination will highlight and select all files in the particular folder. Note that the highlight color of your selection may vary, depending on the operating system or its version. In most of them, it is either gray or blue:
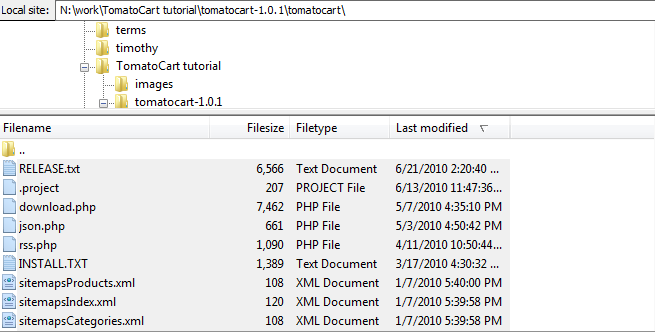 Once selected, drag the files to the right and drop them. The transfer should begin. This is going to take a bit, between 10 and 20 minutes, depending on your Internet connection, thus grab a coffee and create a MySQL database for your new store in the meantime.
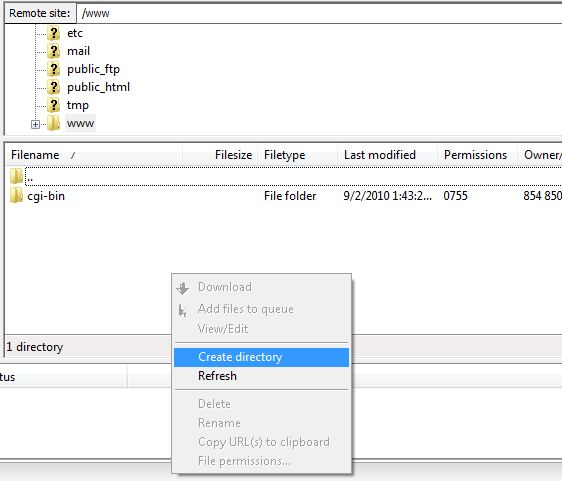
This tutorial supposes you are installing the store in the main folder of your account, meaning it will be accessible directly via your domain name, www.yourdomain.com, for example. If you are looking to have it in a subfolder, say at “store” and have your store visible under www.yourdomain.com/store you should create a new folder and repeat the drag and drop trick, as explained above. You can create a new folder by advancing to your public_html directory and clicking with the right button on it (this happens on the right side). There, click on the Create Directory:
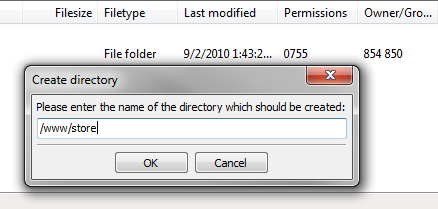
and when the new dialog appear, you should enter the name of the folder:
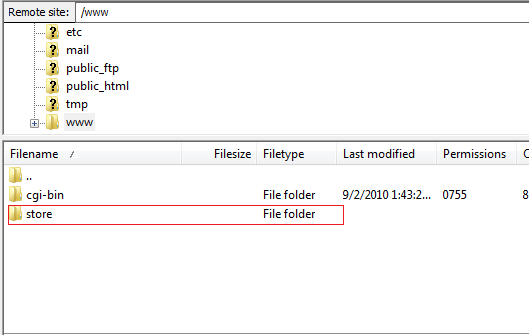
 Upon clicking “OK”, make sure that the new folder is created. It should appear right after the operation:


